How to make 3D nail art designs inside a clear nail. I made it more funny, with different FIMO-s, and different size of glitters. Enjoy :)
A következő címkéjű bejegyzések mutatása: Technikal skill upgrade. Összes bejegyzés megjelenítése
A következő címkéjű bejegyzések mutatása: Technikal skill upgrade. Összes bejegyzés megjelenítése
2009. október 20., kedd

2009. október 18., vasárnap
Injuries: Overfile the natural nail

The most common injury at the nail-saloons the overfileing the natural nail plate.
The fingernail plate is made of about 100 layers of dead, flattened keratin cells. Thousands of nail cells. The nail plate of the hand is thinner, the toenail is thicker. The nail technicians often use heavy hand files, or drills, and overfile more, than the half of the nail plate. The thin nail plate will cause problems also for the client, and for the nail technician too. Only a 240 grit, or higher file allowed to work on natural nails.
Its also impossible of the materials (enhancements, nail polish, base coats...) to adhesion well to a thin, smooth nailplate. On the thin nail plate, the monomers can easily penetrate, cause allergic reactions. Unfortunetly, the most nail technician overfile the natural nailplate.
To the best adhesion, you must file down only the very top layers of the natural nail, wich cause the siny surface. This shine made from oil, and dust, on the nail plate. Use light touch, while file down only 3-4 layers of the natural nail (it's about 2-3%), so you let healthy the 97-98% of the natural nail plate.
2009. szeptember 28., hétfő
Base coat, top coat: what is the difference?

Base coat: To ensure adhesion between the natural nail plate and the colored nail polish. Use in one, thin layer under the color. Features: usually clear, dry quickly to a dull, stickey surface.
Top coat: Use on the top of the hal dried, colored nail polish to ensure protection and high shine. Great to fit flat nail designs, like stones, glitter... Features: Usually clear, slower dry (there are speed-dry top coats in the market), dry to a shiny, smooth surface.

Does 2in1 polishes work? I dont think so. As the two opposite functions of theese opposite properties dont work at the same time. I believe 2in1 (base and top coats) are not for professional use.
2009. szeptember 17., csütörtök
A golden, glossy, shiney nail
Golden designs


1. Custom blended nail bed
2. Build a thin, clear layer on the form. Until the product is not settled (or the gel, before curing) push some golden sliced glitters, glitter foils, and some glitter.

3. Put a small product ball to the nail, and push the golden designs into it.
4. Build the arches, the apex, and protect the designs with a layer of clear product.
5. File the nail to a perfect shape, and use gloss gel, to make the designs more shiney.
2009. szeptember 14., hétfő
Tips and tricks for custom blending

Warm skin tones: undertone of yellow, orange or red
Cool skin tones: undertone of purple, blue or green
CREATE YOUR UNIQUE COLORS
Free edge: Forget the common pink and whites. Add a little shimmer, or creamy brown with the commonly use white powder, and give unique service for everyone.
Rates: Concentrate on the balance of the nail bed and the free edge. The free edge can be maximum the half of the nail bed.
Technique: At the 3rd zone, work thinly, that the differences of the custom blended nail, and the natural nail would be invisible.
Opaque: Add some white, or another opaque color to strengthen the opacity. The more opaque the color, the better the coverage to camouflage problems, and create illusion.
Cool skin tones: undertone of purple, blue or green
CREATE YOUR UNIQUE COLORS
Free edge: Forget the common pink and whites. Add a little shimmer, or creamy brown with the commonly use white powder, and give unique service for everyone.
Rates: Concentrate on the balance of the nail bed and the free edge. The free edge can be maximum the half of the nail bed.
Technique: At the 3rd zone, work thinly, that the differences of the custom blended nail, and the natural nail would be invisible.
Opaque: Add some white, or another opaque color to strengthen the opacity. The more opaque the color, the better the coverage to camouflage problems, and create illusion.
2009. augusztus 31., hétfő
Forget the lifting parts forever
1. Proper mix ratio:
- use a medium wet bead. Neither too dry, neither let the bead not be too wet.
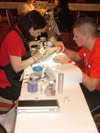
2. Perfect preparation:
- Skin remain on the nail plate: cause lifting for sure
- Gently buff the nail plates surface with a fine hand file. Pay extra attention the parts near the surrounding skin.
-Only one thin coat of primer needed. Primers are heavier than prep products, cannot vaporize that easy. If primer remaining near the surrounding skin, the product will mix with it, and change it. Extra tip: Touch the primers brush hairs with a paper towel, and sponge up some primer.
- Once prepped the nails, follow with apply the product in 20 minutes. If not, the nails need to be dehydrated again.
3. Proper product application:
- - do not touch the skin with the product, or the brush.
- - look at the brush size. Don't use too big brushes.
- - maintain, and fill in the nails regularly
4. Shaping:
 - too thick product will causes lifting!
- build up the arches of the nail: let it be the highest in the middle, and keep thin in every direction (towards the nail-bed, towards the sides and the free edge).
5. Keep away mechanics effort:
• reduce length with scissors or tip cutter
• improper use of electric drills
• heavy files
- use a medium wet bead. Neither too dry, neither let the bead not be too wet.

2. Perfect preparation:
- Skin remain on the nail plate: cause lifting for sure
- Gently buff the nail plates surface with a fine hand file. Pay extra attention the parts near the surrounding skin.
-Only one thin coat of primer needed. Primers are heavier than prep products, cannot vaporize that easy. If primer remaining near the surrounding skin, the product will mix with it, and change it. Extra tip: Touch the primers brush hairs with a paper towel, and sponge up some primer.
- Once prepped the nails, follow with apply the product in 20 minutes. If not, the nails need to be dehydrated again.
3. Proper product application:
- - do not touch the skin with the product, or the brush.
- - look at the brush size. Don't use too big brushes.
- - maintain, and fill in the nails regularly
4. Shaping:

- build up the arches of the nail: let it be the highest in the middle, and keep thin in every direction (towards the nail-bed, towards the sides and the free edge).
5. Keep away mechanics effort:
• reduce length with scissors or tip cutter
• improper use of electric drills
• heavy files
2009. augusztus 23., vasárnap
Correct mix ratio
 Imagezoo
Here's an easy way to determine the proper consistency for l/p enhancement products:
1. Use a clean brush to make a normal bead.
2. Dip the brush totally onto the dappen dish to drink up as many monomers as the hairs can.
When taking out the brush, gently pull down one side on the dappen dish.
3. Place the wet brush onto the very top of the powder, and draw a little line. The powder will stick to the hairs, becoming a bead.
Place the bead to a clean nail tip, placing it directly over the center of the tip.
Watch the bead for 10 seconds:
- Does the bead begin to settle and flow out almost immediately?
- Does the height of the bead drop halfway or more within 10 seconds?
- Does the bead seem to lose most of its original shape?
- Can you see a ring of excess liquid around the base of the bead?
- Would this bead be difficult to control, or would it flow into the skin surrounding the nail plate?
If you answered YES to any of the questions above, your bead is probably a wet consistency. Nail enhancements made with excessively wet mix ratios are prone to develop tiny stress fractures, cracks, and lifting near the cuticle area or sidewalls. Also, discoloration becomes more likely, and there will be an increased chance of developing an allergic reaction to the product.
- Does the bead melt out fairly slowly and have a "frosted glass" appearance?
- After 10 seconds, does the bead hold a smooth, dome like shape?
- Does the overall height of the dome drop only 1/4 of the original height?
- Does all of the liquid stay in the bead without a ring of excess liquid around the base?
- Is the bead easy to control, and does it retain its shape once its placed?
If you answered YES to all of the questions, you are probably using a medium mixture, so CONGRATULATIONS. Make sure you always stick to this procedure. You will be much less likely to having problems.
- Does the bead hold its original shape and/or melt out very little?
- Does the bead height and shape remain unchanged after 10 seconds?
- Does the bead look lumpy or have a crusty appearance?
- Is the bead difficult to control and shape into place?

Doug Schoon: Nail Structure and product chemistry
Feliratkozás:
Bejegyzések (Atom)
